%201.png)
How to Clean Pool Tile Without Draining in 5 Steps
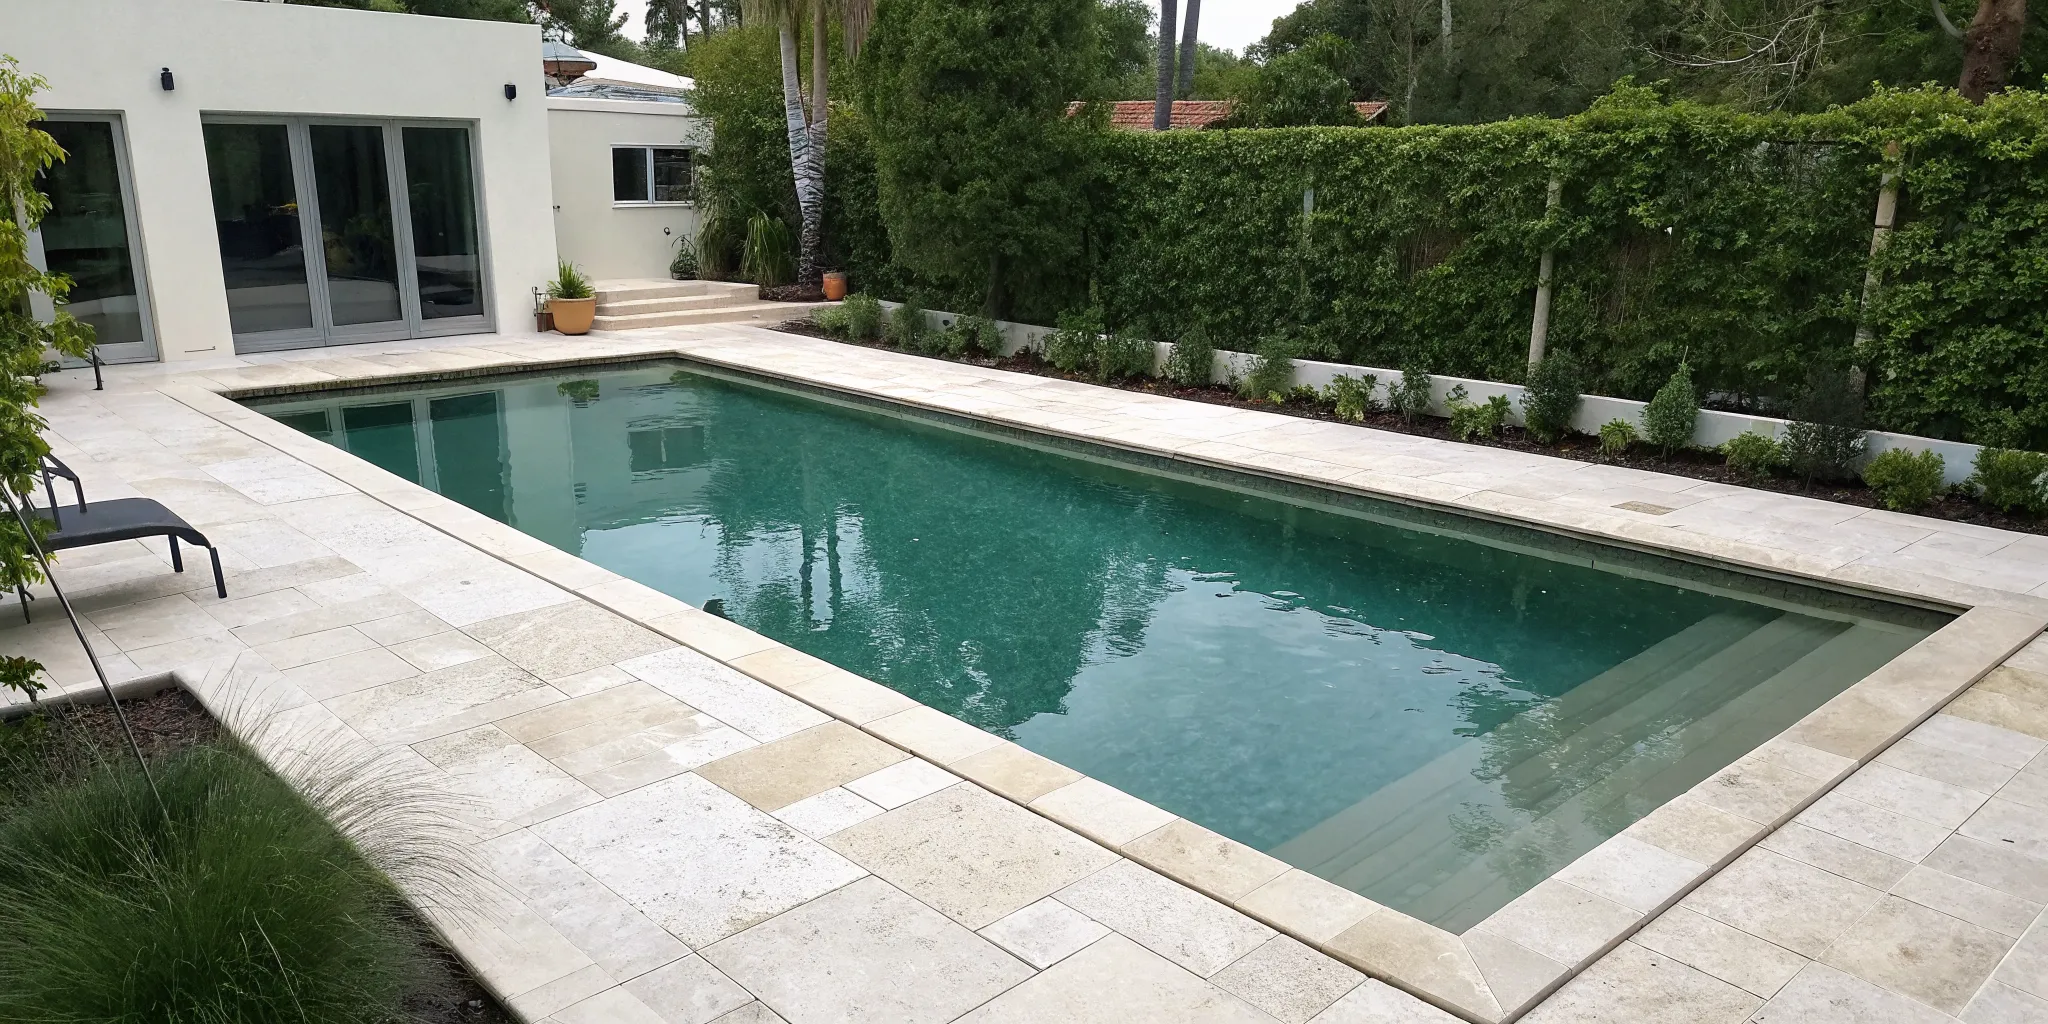
Some pool maintenance tasks feel like they should be left to the pros, and scrubbing that stubborn waterline stain is often one of them. It can seem like a daunting job that will take up your whole weekend. But what if I told you it’s a completely doable DIY project? With the right tools and a clear plan, you can get professional-looking results yourself. The biggest secret is knowing how to clean pool tile without draining the water, which saves an incredible amount of time and hassle. This step-by-step guide is designed to empower you to tackle the job with confidence and get your tiles looking brand new again.
Key Takeaways
- Tackle the Root Cause of Scale: The white film on your tiles is calcium buildup, caused by a mix of Colorado's hard water, unbalanced chemistry, and evaporation. Addressing these core issues is the key to a long-term solution.
- Prevention is Simpler Than Scrubbing: A consistent routine is your best defense against future buildup. Prioritize weekly brushing along the waterline, keeping your water chemistry balanced, and using a pool cover to reduce the chances of scale forming.
- Protect Your Tiles from Damage: While many light stains can be handled yourself, thick or stubborn calcium deposits often require professional attention. If scrubbing isn't working, call an expert to avoid scratching or permanently damaging your pool tiles.
What Causes That White Film on Your Pool Tiles?
Ever noticed that chalky, white line creeping up your pool tiles at the waterline? It’s a common sight for pool owners, but that doesn’t make it any less frustrating. This stubborn film is usually calcium scale, a buildup of mineral deposits that clings to your pool surfaces. Think of it like the hard water spots you see on a glass shower door, but much tougher to remove. It not only looks unappealing but can also become rough to the touch and damage your tile and grout over time if left unchecked.
Understanding what causes this buildup is the first step to getting rid of it for good. It’s rarely just one thing; instead, it’s a perfect storm of conditions. The main culprits are a combination of factors that are especially common here in Colorado. We’re talking about our naturally hard water, the delicate balance of your pool’s chemistry, and the simple process of evaporation. When these three things work together, they create the perfect environment for calcium to fall out of the water and stick to your tiles. The good news is that once you know the cause, you can take targeted steps to clean it off and prevent it from coming back. We can help you find the right supplies and chemicals to manage your water and keep your tile looking its best.
Hard Water in Colorado
Here in Colorado, we’re no strangers to hard water. This simply means our water has a high concentration of dissolved minerals, especially calcium. While it’s perfectly fine to drink, it can be a real headache for pool owners. As the water in your pool sits, that calcium is always present. When conditions are right, it separates from the water and forms a crusty deposit known as calcium carbonate on your tiles. This is the classic, flaky white scale that’s relatively easy to remove with the right approach. If you see a harder, grayer deposit, you might be dealing with calcium silicate, which is much tougher and often requires professional help.
Unbalanced Pool Chemistry
Your pool’s chemistry is a delicate balancing act, and when it’s off, it can lead directly to scale buildup. A high pH, high alkalinity, or excessive calcium hardness level creates an environment where calcium can’t stay dissolved in the water. Instead, it precipitates out and attaches to your pool surfaces. This is why regular water testing is so critical. Failing to keep your water balanced is one of the fastest ways to encourage scale formation. Our routine cleaning and maintenance services always include a thorough water chemistry check to stop these issues before they start, keeping your tile pristine and your water healthy.
The Role of Evaporation
Colorado’s dry climate and intense sun mean our pools lose a lot of water to evaporation. When water evaporates, it leaves everything else behind, including all those minerals. This process constantly increases the concentration of calcium in your pool water, especially at the waterline where the evaporation is happening. Think of it like boiling a pot of salt water; the water disappears, but the salt remains. A heated pool or spa will experience this even faster. This constant mineral concentration makes it much easier for scale to form, creating that tell-tale white ring around your pool.
Gathering Your Tile-Cleaning Toolkit
Before you roll up your sleeves, let’s make sure you have the right tools for the job. Using the correct supplies not only makes cleaning more effective but also protects your pool tiles from accidental damage. Think of it like cooking: the right ingredients and utensils make all the difference. You can find many of these items at a local pool supply store, or you can skip the trip and get professional-grade supplies and chemicals directly from us. Having everything ready to go will make the process smooth and simple.
Your Cleaning Supply Checklist
Depending on the severity of the buildup, you might need a few different options. For light cleaning, a simple paste of baking soda and water can work wonders. Just mix it until it’s thick, apply it to the tiles, and scrub. Another great DIY solution is a spray bottle filled with one part white vinegar and three parts water. For tougher calcium deposits, a pumice stone can be effective, but you must use it gently and keep it wet to avoid scratching the tile. You can also use a dedicated calcium-releasing cleaner that fizzes on contact to break down stubborn scale.
Essential Safety Gear
Safety should always be your top priority when handling any cleaning products, even household ones like vinegar. Always wear waterproof gloves to protect your skin and safety glasses to shield your eyes from splashes. Before you start, take a moment to read the safety information on any commercial products you’re using. Some cleaners may have specific ventilation requirements or other instructions you’ll want to follow. It’s a simple step that ensures your tile-cleaning project is a safe one.
The Right Tool for the Job
Not all scrubbing tools are created equal, and using the wrong one can scratch your beautiful tiles. The best tool depends entirely on your tile material. For delicate surfaces like ceramic or glass tiles, always use a soft, nylon-bristle brush or a gentle scrub pad. If you have tougher porcelain tiles, you can often use a firmer scrub pad without issue. If you accidentally scratch or damage a tile, don’t worry. A professional can often perform small repairs to restore its look. The key is to start gentle and only apply more pressure or use a stronger tool if absolutely necessary.
Your Step-by-Step Guide to Cleaning Tiles (Without Draining!)
Ready to tackle that tile line? With the right tools and a little bit of elbow grease, you can get your pool tiles sparkling again without the hassle of draining your pool. This five-step guide will walk you through the process, from prepping your water to the final rinse. It’s a straightforward project that makes a huge difference in how your pool looks and feels. Let’s get started.
Step 1: Test and Balance Your Water
Before you even think about scrubbing, grab your water testing kit. Properly balanced water chemistry is your first line of defense against future buildup and makes your current cleaning efforts much more effective. If your pH, alkalinity, or calcium hardness levels are off, it can contribute to scale formation and even damage your grout over time. Balancing the water first creates a stable environment, ensuring the cleaners you use work as intended without causing other issues. Think of it as creating the perfect canvas before you start painting.
Step 2: Choose Your Cleaning Method
Next, decide on your cleaning approach based on the severity of the stains. For light, fresh calcium spots, a simple solution of white vinegar and water in a spray bottle can work surprisingly well. Just spray it on and scrub. For more stubborn, layered scale, you’ll likely need a chemical cleaner specifically designed to dissolve calcium. Look for a product that is safe for your type of tile. A gel-based cleaner is often a great choice because it clings to the vertical tile surface, giving it more time to work on breaking down the deposits.
Step 3: Apply the Cleaner and Let It Work
Once you have your cleaner, it’s time for application. Apply it directly to the stained tiles along the waterline. If you’re using a chemical cleaner, you might see it start to fizz or bubble as it reacts with the calcium deposits. This is a good sign that it’s working! Give the product enough time to do its job, following the manufacturer's instructions for how long it should sit. Rushing this step will only mean more scrubbing for you later, so be patient and let the cleaner break down the buildup.
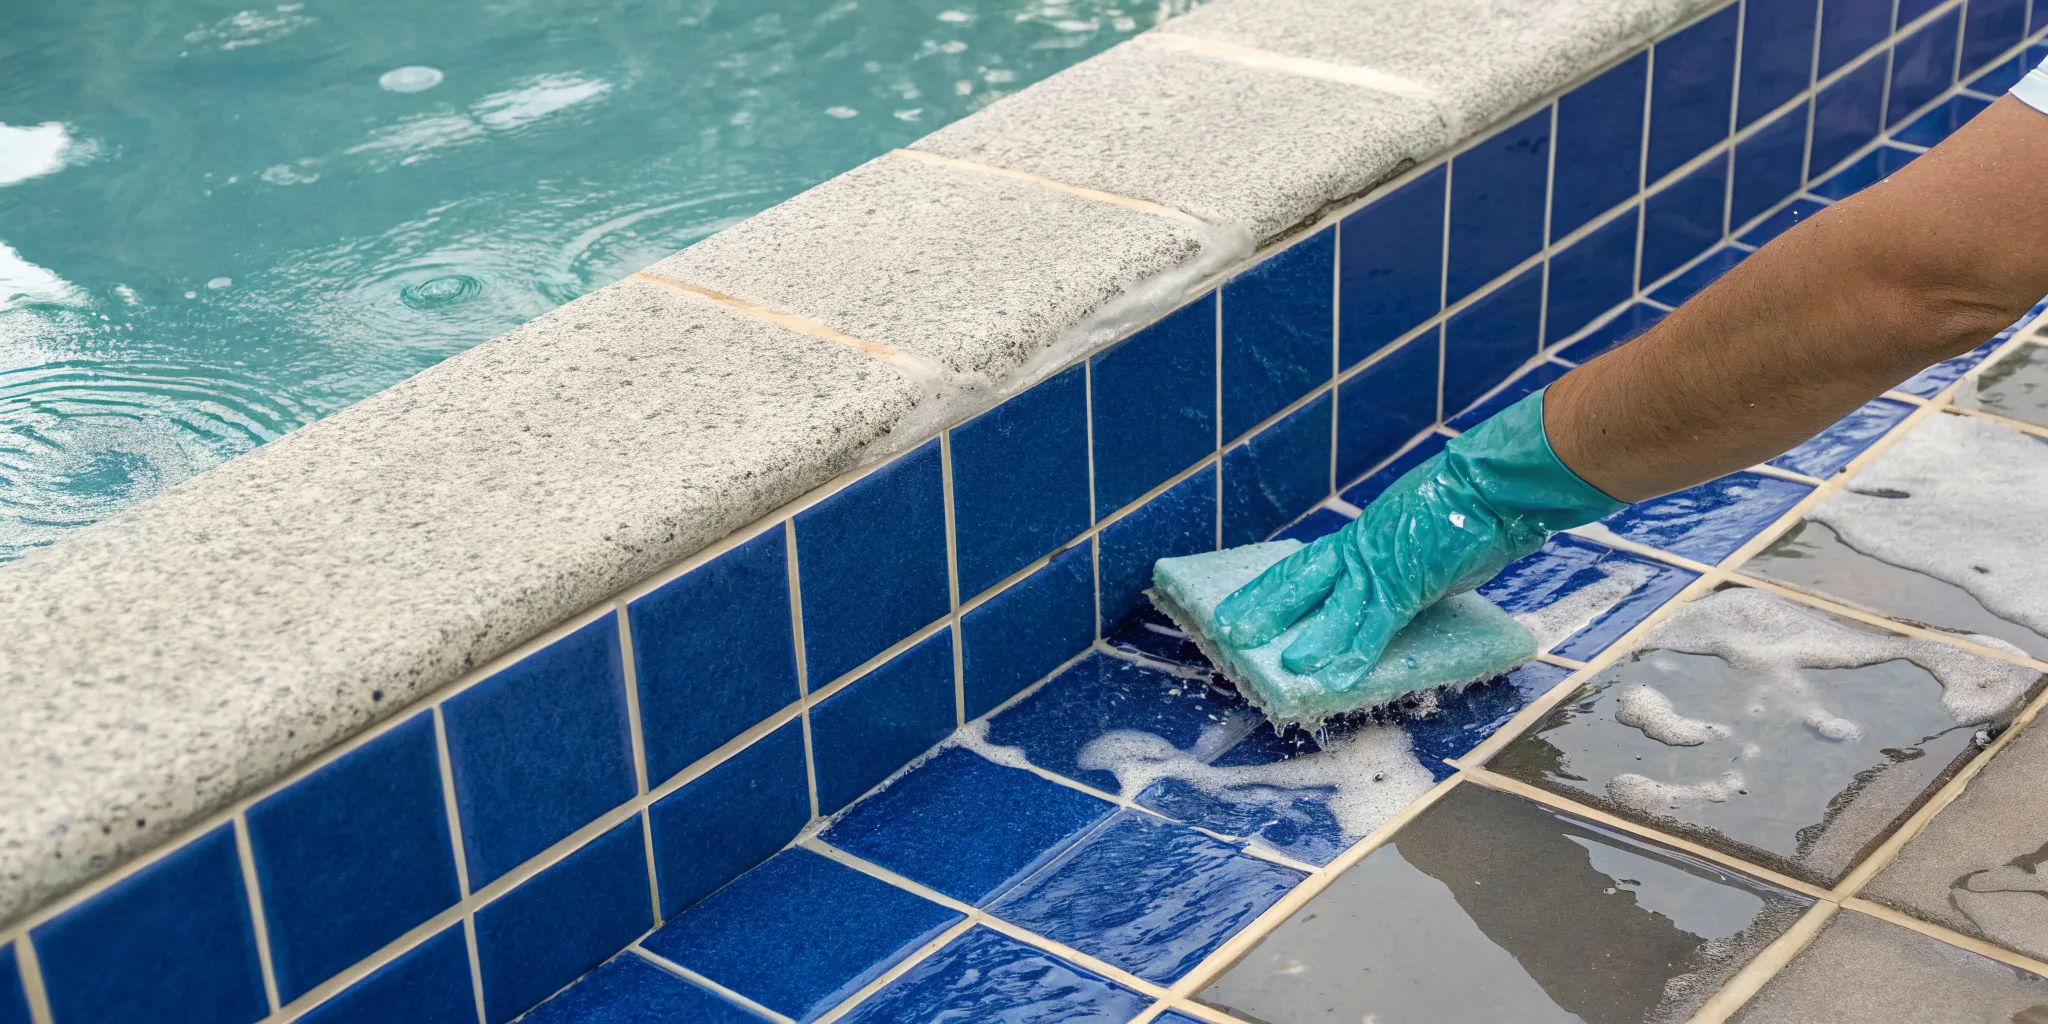
Step 4: Scrub with the Right Technique
Now it’s time to scrub away the loosened grime. The right tool is essential to avoid damaging your tiles. A pumice stone or a stiff, nylon-bristle brush is perfect for most porcelain and ceramic tiles. If you have delicate glass or hand-painted tiles, use a softer scrub pad to prevent scratches. Work in small, circular motions with firm pressure. For really tough spots, a plastic putty knife can help you gently chip away at thicker scale deposits that the cleaner has softened.
Step 5: Rinse and Admire Your Work
After you’ve scrubbed a section, rinse it thoroughly with pool water. This washes away the cleaning solution and all the little bits of calcium and grime you’ve just removed. A good rinse prevents residue from drying on the tile or falling into your pool. Once you’ve rinsed everything, take a step back and admire your work. Your pool tiles should look bright, clean, and ready for summer. For ongoing care, regular pool cleaning and maintenance will keep that sparkle lasting all season long.
Safety First: How to Handle Pool Cleaning Chemicals
Working with pool chemicals can feel a bit intimidating, but it doesn't have to be. The key is to treat them with respect. Taking a few simple precautions ensures you get sparkling clean tiles without putting yourself, your family, or your pool at risk. Think of it like cooking with a very hot oven; you use oven mitts and follow the recipe. The same logic applies here. A little bit of care goes a long way in preventing accidents and protecting your beautiful pool finish.
Wear the Right Protective Gear
Before you even open a bottle of tile cleaner, make sure you’re properly geared up. This isn't the time to skimp on safety. At a minimum, you should always wear gloves and eye protection to shield your hands and eyes from splashes. Acid-based cleaners, even natural ones like vinegar, can cause irritation. I also recommend wearing long sleeves and pants to protect your skin. It might feel like overkill on a warm Colorado day, but a chemical burn is a surefire way to ruin your afternoon. If you're ever unsure about what gear you need, our team can help you find the right supplies and chemicals for the job.
Handle Chemicals with Care
When it comes to pool chemicals, more is definitely not better. Using harsh chemicals or applying them too frequently can actually damage your pool tiles, leading to etching and fading. Always read and follow the manufacturer's instructions on the label. This includes how to mix solutions (if required) and how much to apply. Never mix different chemicals together, as this can create dangerous reactions. If you notice your tile is already looking worn or cracked, harsh cleaners could make it worse. It might be a sign that you need professional equipment repairs or servicing to address an underlying issue.
Always Test a Small Spot First
Here’s a pro tip that will save you a lot of potential heartache: always test your cleaning solution on a small, hidden area first. Think of it as a patch test for your pool. Pick a spot that’s out of sight, maybe behind a ladder or in a corner, and apply the cleaner as directed. This simple step allows you to see how the tile reacts before you commit to cleaning the entire waterline. It’s especially important if you have delicate stone or custom mosaic tiles. A quick test can prevent a costly mistake and keep your pool looking its best. If a test does go wrong, our remodels and rehabs team can help restore your tile's appearance.
Protect Your Pool and Deck
Your job isn’t quite done once the scrubbing is finished. It’s crucial to thoroughly rinse the cleaned area with pool water. Failing to rinse away all the cleaning agents can leave behind a residue that attracts more dirt or reacts with your pool chemistry, leading to new stains. Be mindful of where you're rinsing, too. Try to prevent the cleaning solution from splashing onto your deck or coping, as some chemicals can discolor or damage these surfaces. A little extra care during the final rinse ensures your hard work pays off and contributes to a healthier, cleaner pool environment, which is the ultimate goal of any good cleaning and maintenance routine.
Keeping Calcium Away for Good
Once you’ve put in the effort to get your tiles sparkling, the last thing you want is for that chalky white film to come right back. The secret to clean tiles isn't just about scrubbing them once a season; it's about creating a simple, consistent care routine. Think of it as prevention. A few small, regular habits can stop calcium scale from ever getting a foothold, saving you from a much bigger cleaning job down the road. This proactive approach not only keeps your pool looking great but also protects your tiles and grout from long-term damage caused by mineral deposits.
Staying ahead of calcium buildup is all about consistency. By integrating a few key practices into your regular pool care, you can maintain that clean, beautiful look and protect your investment. These steps don't require a lot of time, but they make a world of difference in keeping your pool looking its best, especially with Colorado's hard water. We know the struggle is real here. But with the right strategy, you can spend more time enjoying your pool and less time fighting with scale. Let’s walk through the best ways to keep that pesky calcium scale from making a comeback.
Brush Your Pool Weekly
Making a weekly date to brush your pool is one of the most effective things you can do to prevent calcium buildup. This simple task physically dislodges mineral particles and dirt from the walls and tiles before they have a chance to harden into stubborn scale. Use a high-quality pool brush and make your way around the entire waterline. It only takes a few minutes, but this habit is your first line of defense. Regular cleaning is the best way to stop calcium from accumulating, ensuring your tiles stay smooth and clean all season long.
Maintain Balanced Water Chemistry
Your pool’s water chemistry is the foundation of a healthy, scale-free pool. When your water’s pH, alkalinity, or calcium hardness levels are off, it creates the perfect environment for scale to form. Unbalanced water can also damage your tile grout and pool equipment over time. Make it a point to test your water regularly and adjust the chemicals as needed. If you’re not comfortable managing the chemistry yourself, our cleaning and maintenance services can take care of it for you. Keeping your water balanced is essential for the long-term health and appearance of your pool.
Use a Pool Cover
A pool cover is a surprisingly powerful tool in the fight against calcium scale. The main reason scale forms at the waterline is due to evaporation, which leaves minerals behind. A good cover drastically reduces evaporation, meaning the minerals stay dissolved in the water instead of clinging to your tiles. It also helps keep out leaves and dirt, which can throw off your water chemistry. Using a cover is an easy, passive way to protect your pool, conserve water, and minimize the chances of calcium deposits forming in the first place.
Know the Early Warning Signs
Catching calcium buildup early makes it much easier to handle. Get in the habit of visually inspecting your tiles whenever you’re near the pool. Look for a faint, hazy white line starting to form at the waterline or feel for a slightly rough texture on the tile surface. Addressing these early signs promptly, often with just a bit of extra brushing, can prevent a full-blown scale problem. If you ignore the initial buildup, it will only get harder to remove. When you spot scum or scaling that doesn't brush away easily, it’s a good signal that it might be time to call for professional help.
When to Call in the Pool Care Pros
Tackling pool tile cleaning yourself can be incredibly satisfying. But sometimes, you’ll run into a problem that a little elbow grease just can’t solve. Knowing when to put down the pumice stone and pick up the phone is just as important as knowing how to scrub. For certain jobs, calling a professional is the smartest move to protect your pool’s surface and your sanity. They come equipped with commercial-grade tools and have the training to identify the root cause of the buildup. A professional cleaning and maintenance service can handle tough jobs efficiently, saving you from potential frustration and costly damage.
Stubborn Stains That Won't Budge
If you’ve followed all the steps and are still staring at a thick, crusty line of calcium, it’s a clear sign to call for backup. Some mineral deposits are so established that they’ve chemically bonded to the tile surface, making them nearly impossible to remove with standard methods. Neglecting this kind of buildup can lead to permanent scum lines and even damage your tile. If your efforts aren’t making a dent or the scale is more than a quarter-inch thick, continuing to scrub aggressively could scratch, chip, or otherwise ruin your beautiful tile, leading to more extensive repairs later on.
The Benefits of a Professional Cleaning
When you bring in a professional, you’re getting more than just an extra set of hands. Experts know exactly how to clean tiles properly without causing damage. They use specialized tools and techniques, like bead or soda blasting, that can safely strip away years of calcium buildup without etching the tile surface. A pro can get the job done in a fraction of the time it would take you, and they’ll do it right the first time. This gives you peace of mind knowing your pool is in capable hands and frees you up to simply enjoy your crystal-clear water.
Why a Colorado Pool Pro Makes a Difference
Here in Colorado, we deal with notoriously hard water, which means our pools are especially prone to stubborn calcium buildup. A local pool professional understands the specific challenges our water chemistry and climate present. If you have a lot of tough calcium scale, it’s best to contact a pool maintenance professional who has experience with the exact issues common in our area. They have the right equipment and regional knowledge to effectively treat heavy scaling, ensuring your pool not only looks great but is also protected from future issues related to our unique environment.
Frequently Asked Questions
How often should I deep clean my pool tiles? While you should be brushing your waterline weekly as part of your regular routine, a dedicated deep clean isn't usually needed more than once or twice a year. The best indicator is your pool itself. If you start to feel a rough texture on the tiles or see a faint white haze that brushing doesn't remove, it's time to schedule a more thorough cleaning. For pools in Colorado with our hard water, staying on top of it before it becomes a major project is key.
Is a pumice stone really safe for my pool tiles? A pumice stone can be a great tool, but only on the right surfaces. It’s generally safe for hard materials like concrete, gunite, and most porcelain or ceramic tiles. However, you should never use one on vinyl liners, fiberglass pools, or delicate custom tiles like glass mosaics, as it will leave permanent scratches. Always keep the stone and the tile surface wet while you scrub gently to minimize the risk of damage.
Why can't I just use a pressure washer to blast the scale off? It’s tempting to think a pressure washer will make quick work of calcium scale, but it often does more harm than good. The high-pressure stream can easily chip your tiles or, more commonly, blast away the grout between them. This can lead to leaks and much more significant repair work down the line. It's better to use chemical cleaners and manual scrubbing, which are tough on scale but gentle on your pool's structure.
The white film on my tiles is really hard and almost gray. Is this still calcium? Yes, that is most likely a more stubborn form of calcium called calcium silicate. While the flaky, white buildup is calcium carbonate, the harder, grayish scale has been on the tile longer and has bonded more tightly to the surface. This type of deposit is extremely difficult to remove with household methods and often requires professional bead blasting or specialized tools to get it off without damaging your tile.
If I had to focus on just one thing to prevent scale, what would it be? Without a doubt, the most important thing you can do is consistently maintain balanced water chemistry. Brushing and using a cover are fantastic habits, but if your pH, alkalinity, and calcium hardness levels are constantly out of whack, you will always be fighting a losing battle against scale. Proper water balance keeps minerals dissolved in the water, preventing them from sticking to your tiles in the first place. It's the foundation of a healthy, beautiful pool.
Related Blogs