%201.png)
Your DIY Guide to Hot Tub Jet Leak Repair

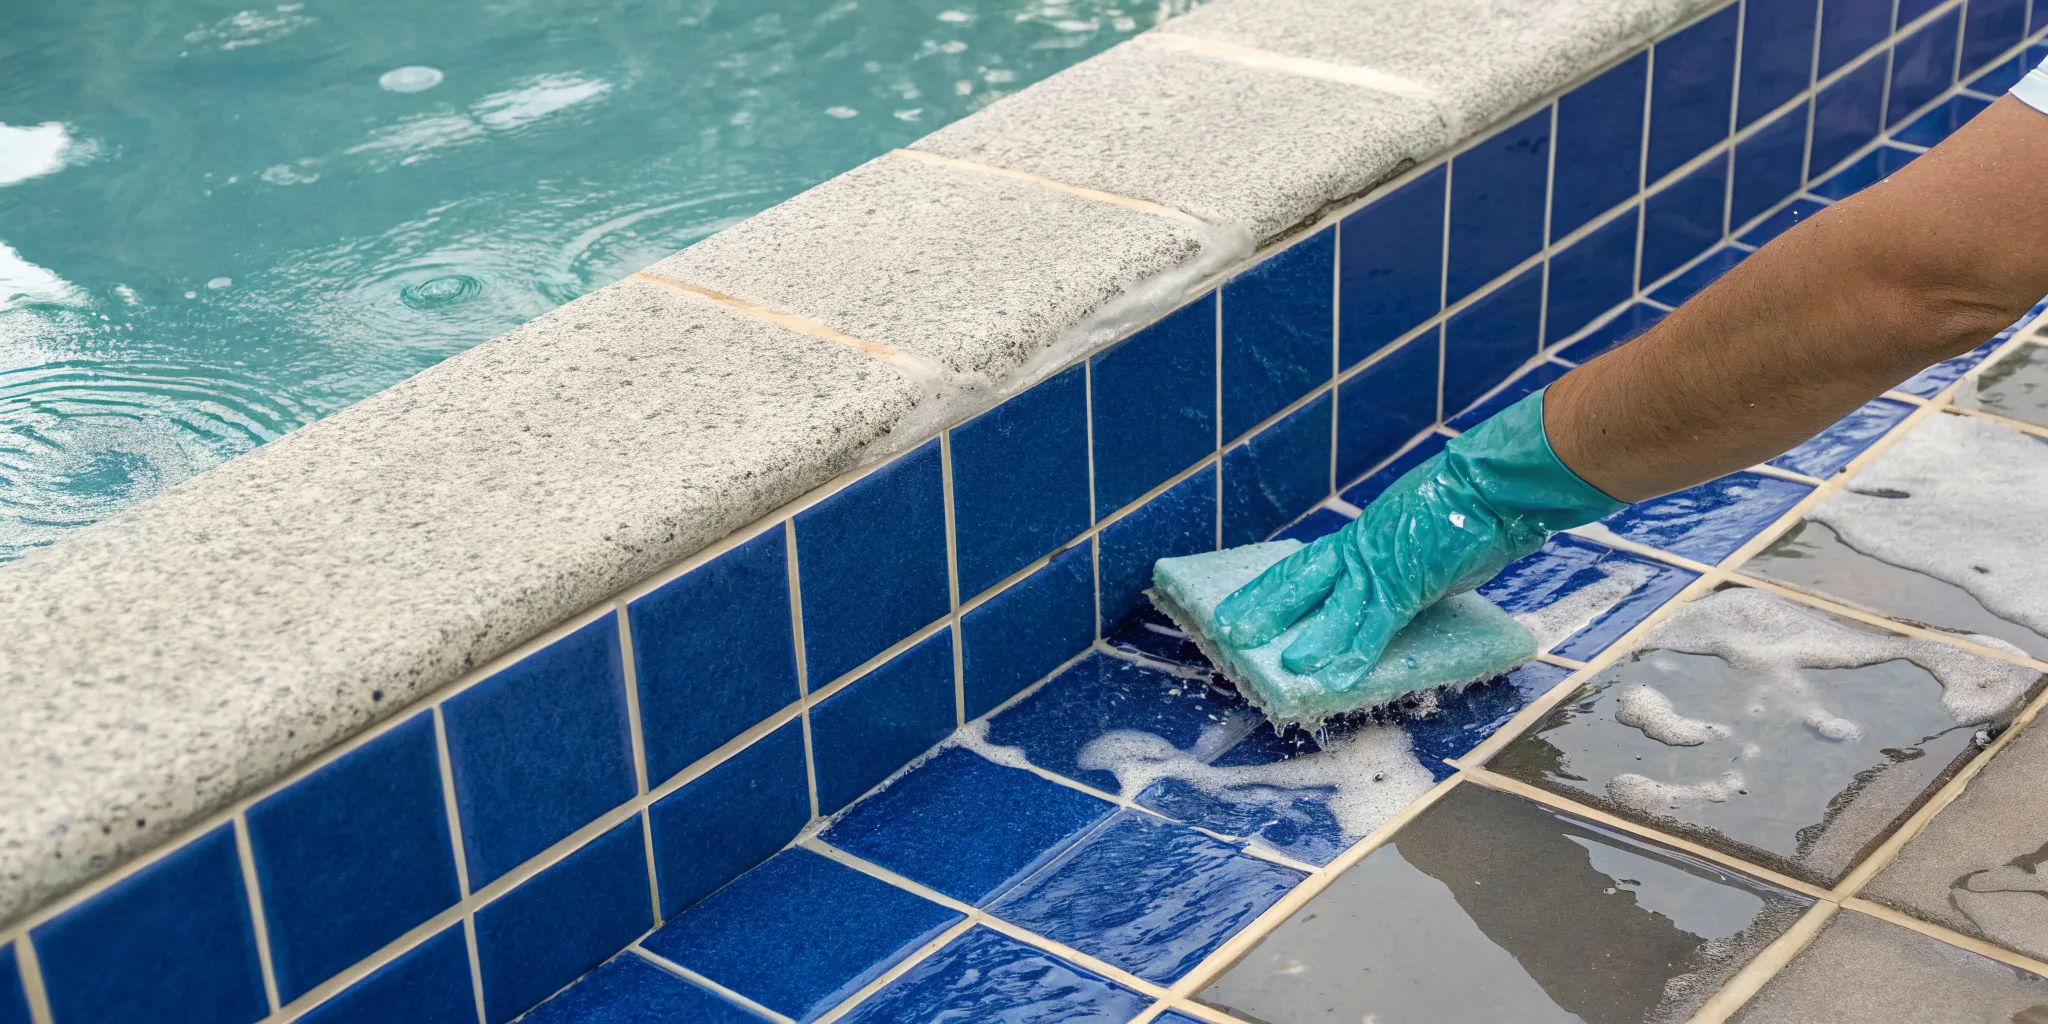
Seeing water where it shouldn’t be is never fun, but a leaking jet doesn’t automatically mean a call to a professional is your only option. For many homeowners here in Colorado, tackling a hot tub jet leak repair is a completely achievable weekend project. It’s a great way to get more familiar with how your spa works and save some money in the process. This step-by-step guide is designed to empower you with the knowledge to diagnose the problem, gather the right materials, and perform the repair correctly. We’ll also help you understand when a leak might be a sign of a bigger issue that is best left to the experts.
Key Takeaways
- Pinpoint the Problem Before You Patch: Most jet leaks come from simple issues like worn gaskets, loose fittings, or small cracks. Use a systematic approach, such as a water level test or dye, to find the exact source before starting any repairs.
- Proper Preparation is Key to a DIY Fix: A successful repair depends on careful preparation. Always turn off the power, drain the water, and thoroughly clean the area before applying a spa-grade waterproof sealant, then allow it to fully cure.
- Prioritize Safety for Complex Jobs: Don't risk creating a bigger problem. If a leak is near electrical components, hidden deep in the insulation, or involves a major crack in the shell, it's best to call a certified technician.
Why Are My Hot Tub Jets Leaking?
Finding a puddle near your hot tub is never a welcome sight, especially when it seems to be coming from the jets themselves. A leaking jet is one of the most common issues hot tub owners face, but the good news is that the cause is usually one of a few usual suspects. The constant exposure to hot, treated water and the vibrations from the pumps can take a toll on the various components that make up your jet assemblies.
Before you can fix the leak, you need to play detective and figure out what’s causing it. From simple seals that have worn out over time to more significant cracks in the jet housing, each problem has its own solution. Understanding the potential culprits is the first step toward getting your spa back in perfect, leak-free condition. Let’s look at the most frequent reasons your hot tub jets might be leaking.
Worn-Out Gaskets and Seals
Think of a gasket as a small rubber or silicone ring that creates a watertight seal between the jet body and the hot tub shell. Over time, exposure to spa chemicals and temperature changes causes these gaskets to lose their flexibility, becoming brittle and cracked. When a gasket fails, water can seep through the gap and drip down the outside of your tub. If you find one leaking gasket, it’s a smart idea to inspect the others, as they are likely the same age and condition. Even if a gasket doesn't have visible cracks, it can still lose its ability to create a proper seal.
Cracked Jet Bodies
The jet body is the plastic housing that holds the jet insert and connects to the spa's plumbing. These components can develop cracks for a few reasons, including age, overtightening during installation, or damage from freezing water if the tub wasn't winterized correctly, a real concern here in Colorado. A crack in the jet body is a more serious issue than a bad gasket because it requires replacing the entire unit. This is a common source for a slow, persistent leak that seems to have no other obvious cause. A careful inspection with a flashlight can often reveal these hairline fractures.
Loose Connections
Your hot tub’s jets are part of a larger plumbing system, and sometimes a leak is simply due to a loose connection. The constant vibration from the pumps can cause the lock nuts that hold the jet bodies tight against the shell to loosen over time. Similarly, the clamps connecting the flexible tubing to the back of the jet can also work their way loose. Before assuming the worst, it’s always worth checking to see if you can simply tighten these connections. Often, a quick turn with a wrench or screwdriver is all it takes to stop the drip.
General Wear and Tear
Hot tubs work hard to provide that relaxing soak, and over the years, general wear and tear is inevitable. The combination of heat, chemicals, and pressure will eventually degrade plastic and rubber components. Leaks can be an early sign that parts are nearing the end of their lifespan. Regular inspections are key to catching these issues before they become major problems, as recommended by many hot tub maintenance guides. While some fixes are simple, persistent leaks or signs of widespread aging might mean it’s time to call for professional equipment repairs and servicing to ensure everything is in safe, working order.
How to Pinpoint the Leak
Okay, you know there's a leak, but where is it coming from? Finding the source is your first mission. It takes a little patience and some detective work, but it’s the most important step in getting your hot tub back in perfect shape. Before you start pulling jets out or applying sealant everywhere, you need a solid game plan. Just guessing can lead to more frustration and potentially bigger problems. By following a few simple diagnostic methods, you can systematically narrow down the possibilities and find the exact location of the leak, saving you time and a major headache.
Think of it as solving a puzzle. Each step gives you a new clue, bringing you closer to the solution. Once you know exactly where the problem is, you're halfway to fixing it. This methodical approach ensures you're addressing the actual issue, not just a symptom. It’s the difference between a quick, effective repair and a weekend-long project that goes nowhere. We'll cover everything from simple visual inspections to using dye for pinpoint accuracy. Let's walk through the four key methods to trace that leak back to its source, starting with the easiest checks first so you can get back to relaxing in your spa.
Start with a Visual Check
Before you get too technical, let’s start with the basics. Sometimes, the problem is hiding in plain sight. Turn off the power to your hot tub for safety, grab a good flashlight, and give the entire shell a thorough inspection, inside and out. Look closely around each jet fitting for any obvious cracks or damage. Remember, it might not even be a jet. A small hairline crack in the acrylic shell can be just as guilty. Pay attention to any areas that look discolored or feel different. This simple first pass can sometimes solve the mystery immediately, saving you a lot of time and effort.
Try the Water Level Test
If a visual check doesn't reveal the culprit, the water level test is your next best move. It’s a straightforward way to narrow down the leak's location. Start by filling the hot tub completely. Then, turn off all the pumps and power. Let the tub sit for 24 hours, or until the water level stops dropping. The final water line will point you to the source. If the water stops draining just below a certain set of jets, you’ve likely found your problem area. This method helps you figure out if the leak is in the upper plumbing, a specific jet, or lower down in the system.
Inspect the Equipment Area
Now it’s time to look under the hood. Carefully open the access panel to your hot tub’s equipment bay. Using your flashlight, look for any signs of moisture, like drips, puddles, or condensation on the pipes and equipment. A common sign of a leak is wet insulation foam. If you find a damp spot, you may need to carefully dig out the wet foam until you find the source of the water. This will help you trace the leak back to a specific pipe, union, or pump seal. If you're not comfortable working in this area, our team is always ready to handle complex equipment repairs.
Use Dye to Find the Exact Spot
Once you’ve narrowed down the general area, a dye test can help you pinpoint the exact location of the leak. With the pump turned off and the water still, add a few drops of hot tub-safe leak detection dye (or even red food coloring) near the suspected jet. Watch the dye closely. If there’s a leak, you’ll see the dye get pulled into the crack or faulty seal. This confirms the precise spot that needs attention. This simple trick takes the guesswork out of the equation, ensuring you apply sealant or make a repair in exactly the right place.
Gathering Your Tools and Materials
Before you get started on the repair, it’s smart to gather everything you’ll need in one place. A little preparation now saves you from making multiple trips back to the garage or store with a half-drained hot tub. Think of it as setting up your mission control. Having the right equipment on hand makes the entire process smoother and less stressful. If you find that your leak requires more than a simple fix, our team is always ready to handle any hot tub repairs you might need.
Your Toolkit
For most jet repairs, you won’t need a massive toolbox. Start with the basics: a set of screwdrivers, pliers, a utility knife, and some old towels for cleanup. The utility knife is especially important, as you may need to cut away some of the spray foam insulation to access the jet body. As the experts at This Old House note, "Finding and accessing the leak is almost always the hardest part of repairing a leaky hot tub." So, be patient and have your tools ready. A bucket is also handy for catching any remaining water and keeping small parts from getting lost.
Replacement Parts and Sealant
The specific parts you need will depend on the source of the leak. It could be a simple gasket or O-ring, or you might need to replace the entire jet body. In some cases, the jet might simply unthread from inside the tub, making the repair much easier. Once you have the old part out, you can take it to a local supplier to find an exact match. You’ll also need a high-quality, waterproof sealant or epoxy designed for plastics. Arctic Spas recommends drying the area completely before you "get it sealed up with some PlasticWeld" or a similar product to ensure a lasting, watertight bond. You can find the right sealant and parts at a dedicated pool and spa supply store.
Safety Gear
Your safety should always be the top priority. Before you begin, make sure you have a pair of safety glasses and waterproof gloves. You’ll be working with sealants and potentially sharp tools, so protecting your eyes and hands is essential. As a reminder from House Improvements, a DIY resource, "The viewer must always take proper safety precautions and exercise caution when taking on any project." Since you’re working near electrical components, it’s critical to be cautious. Always ensure the power to the hot tub is completely shut off at the breaker before you start any work.
A Step-by-Step Guide to Fixing the Leak
Ready to tackle that leak yourself? Following these steps can help you fix a leaking hot tub jet and get back to relaxing. Just remember to work carefully and patiently.
Step 1: Power Down and Drain the Tub
Your safety is the top priority. Before you do anything else, head to your home’s breaker box and completely turn off the power to your hot tub. This step is non-negotiable. Once you're sure the power is off, you can start draining the tub. You don’t need to empty it completely, just drain the water until the level is well below the jet that’s giving you trouble. This gives you a dry, safe area to work in and prevents any more water from escaping while you make the repair.
Step 2: Carefully Remove the Jet
With the area dry, it’s time to remove the leaky jet. Depending on your hot tub model, this process can vary slightly. Most jets can be removed from inside the tub, but you may need to access the back of the jet from the equipment panel. If you can reach it, carefully loosen and remove the large plastic nut holding the jet body in place. Once the nut is off, you should be able to push the entire jet body forward and out into the hot tub shell. Work gently to avoid causing any new cracks or damage.
Step 3: Clean and Inspect the Parts
A clean surface is essential for a watertight seal. Once the jet is out, take a close look at both the jet body and the opening in the hot tub shell. You’ll likely see old sealant and some built-up grime. Carefully scrape all of this away. A plastic scraper can work well here to avoid scratching the acrylic shell. Your goal is to get the surfaces completely clean and smooth. This is also the perfect time to inspect the jet body for any cracks or damage that might be the real source of your leak.
Step 4: Replace Parts or Apply New Sealant
Now it's time to create a new, waterproof seal. If you found a crack in the jet body during your inspection, you'll need to replace the entire part. If the jet itself is fine, a fresh application of sealant should do the trick. Use a high-quality, waterproof silicone sealant designed for spas and pools. Apply a generous bead of the sealant around the opening where the jet will sit. You want to ensure it creates a complete seal all the way around. You can find the right supplies and chemicals for the job at a dedicated spa supply store.
Step 5: Put It Back Together and Test
Once you've applied the sealant, carefully press the jet body back into place, making sure it's seated evenly. If you removed a nut from the back, thread it back on and tighten it until it's snug, but be careful not to overtighten. Now comes the hardest part: waiting. The silicone needs time to cure properly. Let it dry for at least 24 hours, though waiting up to 72 hours is even better for a stronger seal. After it has fully cured, you can refill the tub, turn the power back on, and check your work.
Repair or Replace? Making the Call
Sometimes, a simple reseal isn't enough. If you discovered a crack in the jet body itself during your inspection, a replacement is the only reliable solution. Patching a crack is usually a temporary fix at best and will likely fail again soon. While replacing a jet body is a manageable DIY project for some, it can feel a bit daunting. If you're unsure about sourcing the right part or handling the installation, it’s a good idea to call in a professional. Our team is experienced with all kinds of spa services and can make sure the job is done right.
Common Mistakes to Avoid
A successful repair often comes down to avoiding a few common pitfalls. First, never use a standard household silicone sealant as a substitute for a proper gasket or spa-grade sealant. They aren't designed to withstand the chemicals and temperature of a hot tub. Another frequent mistake is over-tightening the jet nut on the back. This can crack the jet body or the hot tub shell, creating a much bigger problem. Just tighten it until it’s snug. Taking your time and using the right materials will save you from having to do the same repair all over again.
When to Call a Pro
While tackling a leaky jet yourself can be rewarding, it’s just as important to know your limits. Some jobs are simply better left to the experts who have the right tools and experience. Pushing ahead with a complex repair can lead to bigger problems and more headaches down the road. If you find yourself feeling overwhelmed or unsure at any point, it’s a good sign that it’s time to put down the tools and pick up the phone. A professional can get the job done safely and correctly, giving you confidence that your hot tub is in good hands.
If the Leak is Complex
Sometimes, the hardest part of the repair isn't the fix itself, but finding the source of the leak. If the water is coming from a place you can't easily see or reach, like deep within the spray foam insulation, the job can quickly become complicated. Digging through foam to access a hidden pipe or fitting requires patience and precision. A wrong move could damage other components. When a leak is playing hard to get, calling in a professional for their expert spa services can save you a lot of time and frustration. They have specialized tools to pinpoint and fix these tricky leaks efficiently.
For Electrical and Plumbing Safety
Remember, hot tubs are a mix of water and electricity, a combination that demands respect. If a leak is near the pump, heater, or control panel, attempting a DIY fix can be risky without the proper training. Even a small amount of water in the wrong place can create a serious electrical hazard. While some minor leaks are straightforward, anything involving the main equipment should be handled by a certified technician. Our team is trained to handle these delicate repairs safely, ensuring your hot tub is not only leak-free but also completely safe to use.
When There's Major Damage
A small drip from a gasket is one thing, but significant damage is another story. If you discover a large crack in the hot tub shell or in the body of the jet itself, this usually points to a more serious issue. These types of repairs often require specific bonding agents, materials, and techniques to ensure a permanent, waterproof seal. A simple patch kit from the store might not hold up under the constant pressure and temperature changes of a hot tub. For major structural damage, it’s best to consult with a professional who can assess whether a repair or a full replacement part is needed.
For Ongoing Peace of Mind
At the end of the day, you want to relax in your hot tub, not worry about whether your repair will hold. Hot tub leaks can be tough to diagnose and fix correctly. Bringing in a professional gives you the assurance that the job was done right the first time. A certified technician can also spot potential future problems you might have missed, saving you from another leak down the line. Investing in professional spa services provides peace of mind, knowing your hot tub is safe, secure, and ready for you to enjoy whenever you want.
Frequently Asked Questions
Is it okay to use my hot tub if I notice a small leak from a jet? It's best to avoid using your hot tub until the leak is fixed. Even a small leak can worsen over time, potentially causing damage to the equipment or the support structure underneath. More importantly, since hot tubs combine water and electricity, any uncontained moisture near the equipment bay poses a safety risk. It's always smarter to address the issue first.
How can I prevent my hot tub jets from leaking in the first place? Consistent maintenance is your best defense. Regularly balancing your water chemistry helps preserve the gaskets and seals, preventing them from becoming brittle. Also, proper winterization is crucial here in Colorado. Ensuring no water is left in the lines to freeze and expand can save your jet bodies and plumbing from cracking during the cold months.
I tried the dye test and the water level test, but I still can't find the source of the leak. What should I do? First off, good job on the detective work. If you've tried those methods and still can't find the source, the leak is likely hidden deep within the spray foam insulation. At this point, continuing to search on your own can risk damaging other components. This is the perfect time to call a professional for spa services, as they have the tools and experience to locate these tricky leaks without causing more problems.
Can I just use any waterproof sealant from the hardware store to fix the leak? I would strongly advise against it. Standard household sealants aren't formulated to withstand the unique environment of a hot tub, with its constant heat and sanitizing chemicals. They will likely fail quickly, and you'll be right back where you started. You need a high-quality silicone or epoxy specifically designed for pools and spas to create a durable, long-lasting seal.
My leak seems much worse when the jets are running. What does that mean? This is a great clue. If the leak is more noticeable when the pumps are on, it almost always indicates the problem is on the "pressure side" of your plumbing. This means the leak is in a pipe or fitting that comes after the pump. The force of the water being pushed through the system is what causes the water to escape. These types of leaks often require professional equipment repairs to resolve correctly.
Related Blogs